Use with Codex++
[!WARNING] Codex++ (CodexPlusPlus) is a third-party enhancement tool for the Codex desktop app — it is not official OpenAI Codex. If you're configuring the official Codex CLI (command line, editing
~/.codex/config.tomlby hand), see Use with Codex instead. The names are similar but the tools are different — don't mix them up.
Codex++ launches the Codex desktop client through an external launcher and injects enhancements, without modifying Codex's installed files. Connecting to yylx.io goes through its provider-configuration feature: you add yylx.io as a provider in the manager's GUI, it writes the configuration into Codex for you, and from then on you start Codex via the Codex++ entry.
Before you start
| Item | Details |
|---|---|
| Codex desktop app | Installed and opened at least once (Codex++ is an external launcher for it, not a replacement) |
| Codex++ | Installed from GitHub Releases; installation adds two entries: Codex++ (silent launcher) and Codex++ Manager (control panel) |
| API Key | Created in the yylx.io console; include codex in the name to make usage easier to trace |
First, open the "API Keys" page in the yylx.io console, create or pick a Key dedicated to Codex, and copy it. Don't paste the full Key into public chats or issues.
Download and install Codex++
Codex++ is open source, hosted on GitHub: BigPizzaV3/CodexPlusPlus.
- Open the Releases page.
- In the latest release's asset list, pick the installer for your OS:
- Windows:
CodexPlusPlus-*-windows-x64-setup.exe - macOS Intel:
CodexPlusPlus-*-macos-x64.dmg - macOS Apple Silicon:
CodexPlusPlus-*-macos-arm64.dmg
- Windows:
- Install it the usual way. Two entries appear after installation:
Codex++(silent launcher that starts Codex with enhancements injected) andCodex++ Manager(control panel). - Open
Codex++ Managerat least once so you can configure it.
Add yylx.io as a provider
Open Codex++ Manager and click "Provider Configuration" (供应商配置) in the sidebar.
[!NOTE] Make sure "Enable provider switching" (启用供应商配置切换) at the top is checked — it's on by default. When it's off, the "Use" button below is disabled: configurations are saved but never written into Codex.
1. Add a provider
Click "Add Provider" (添加供应商).
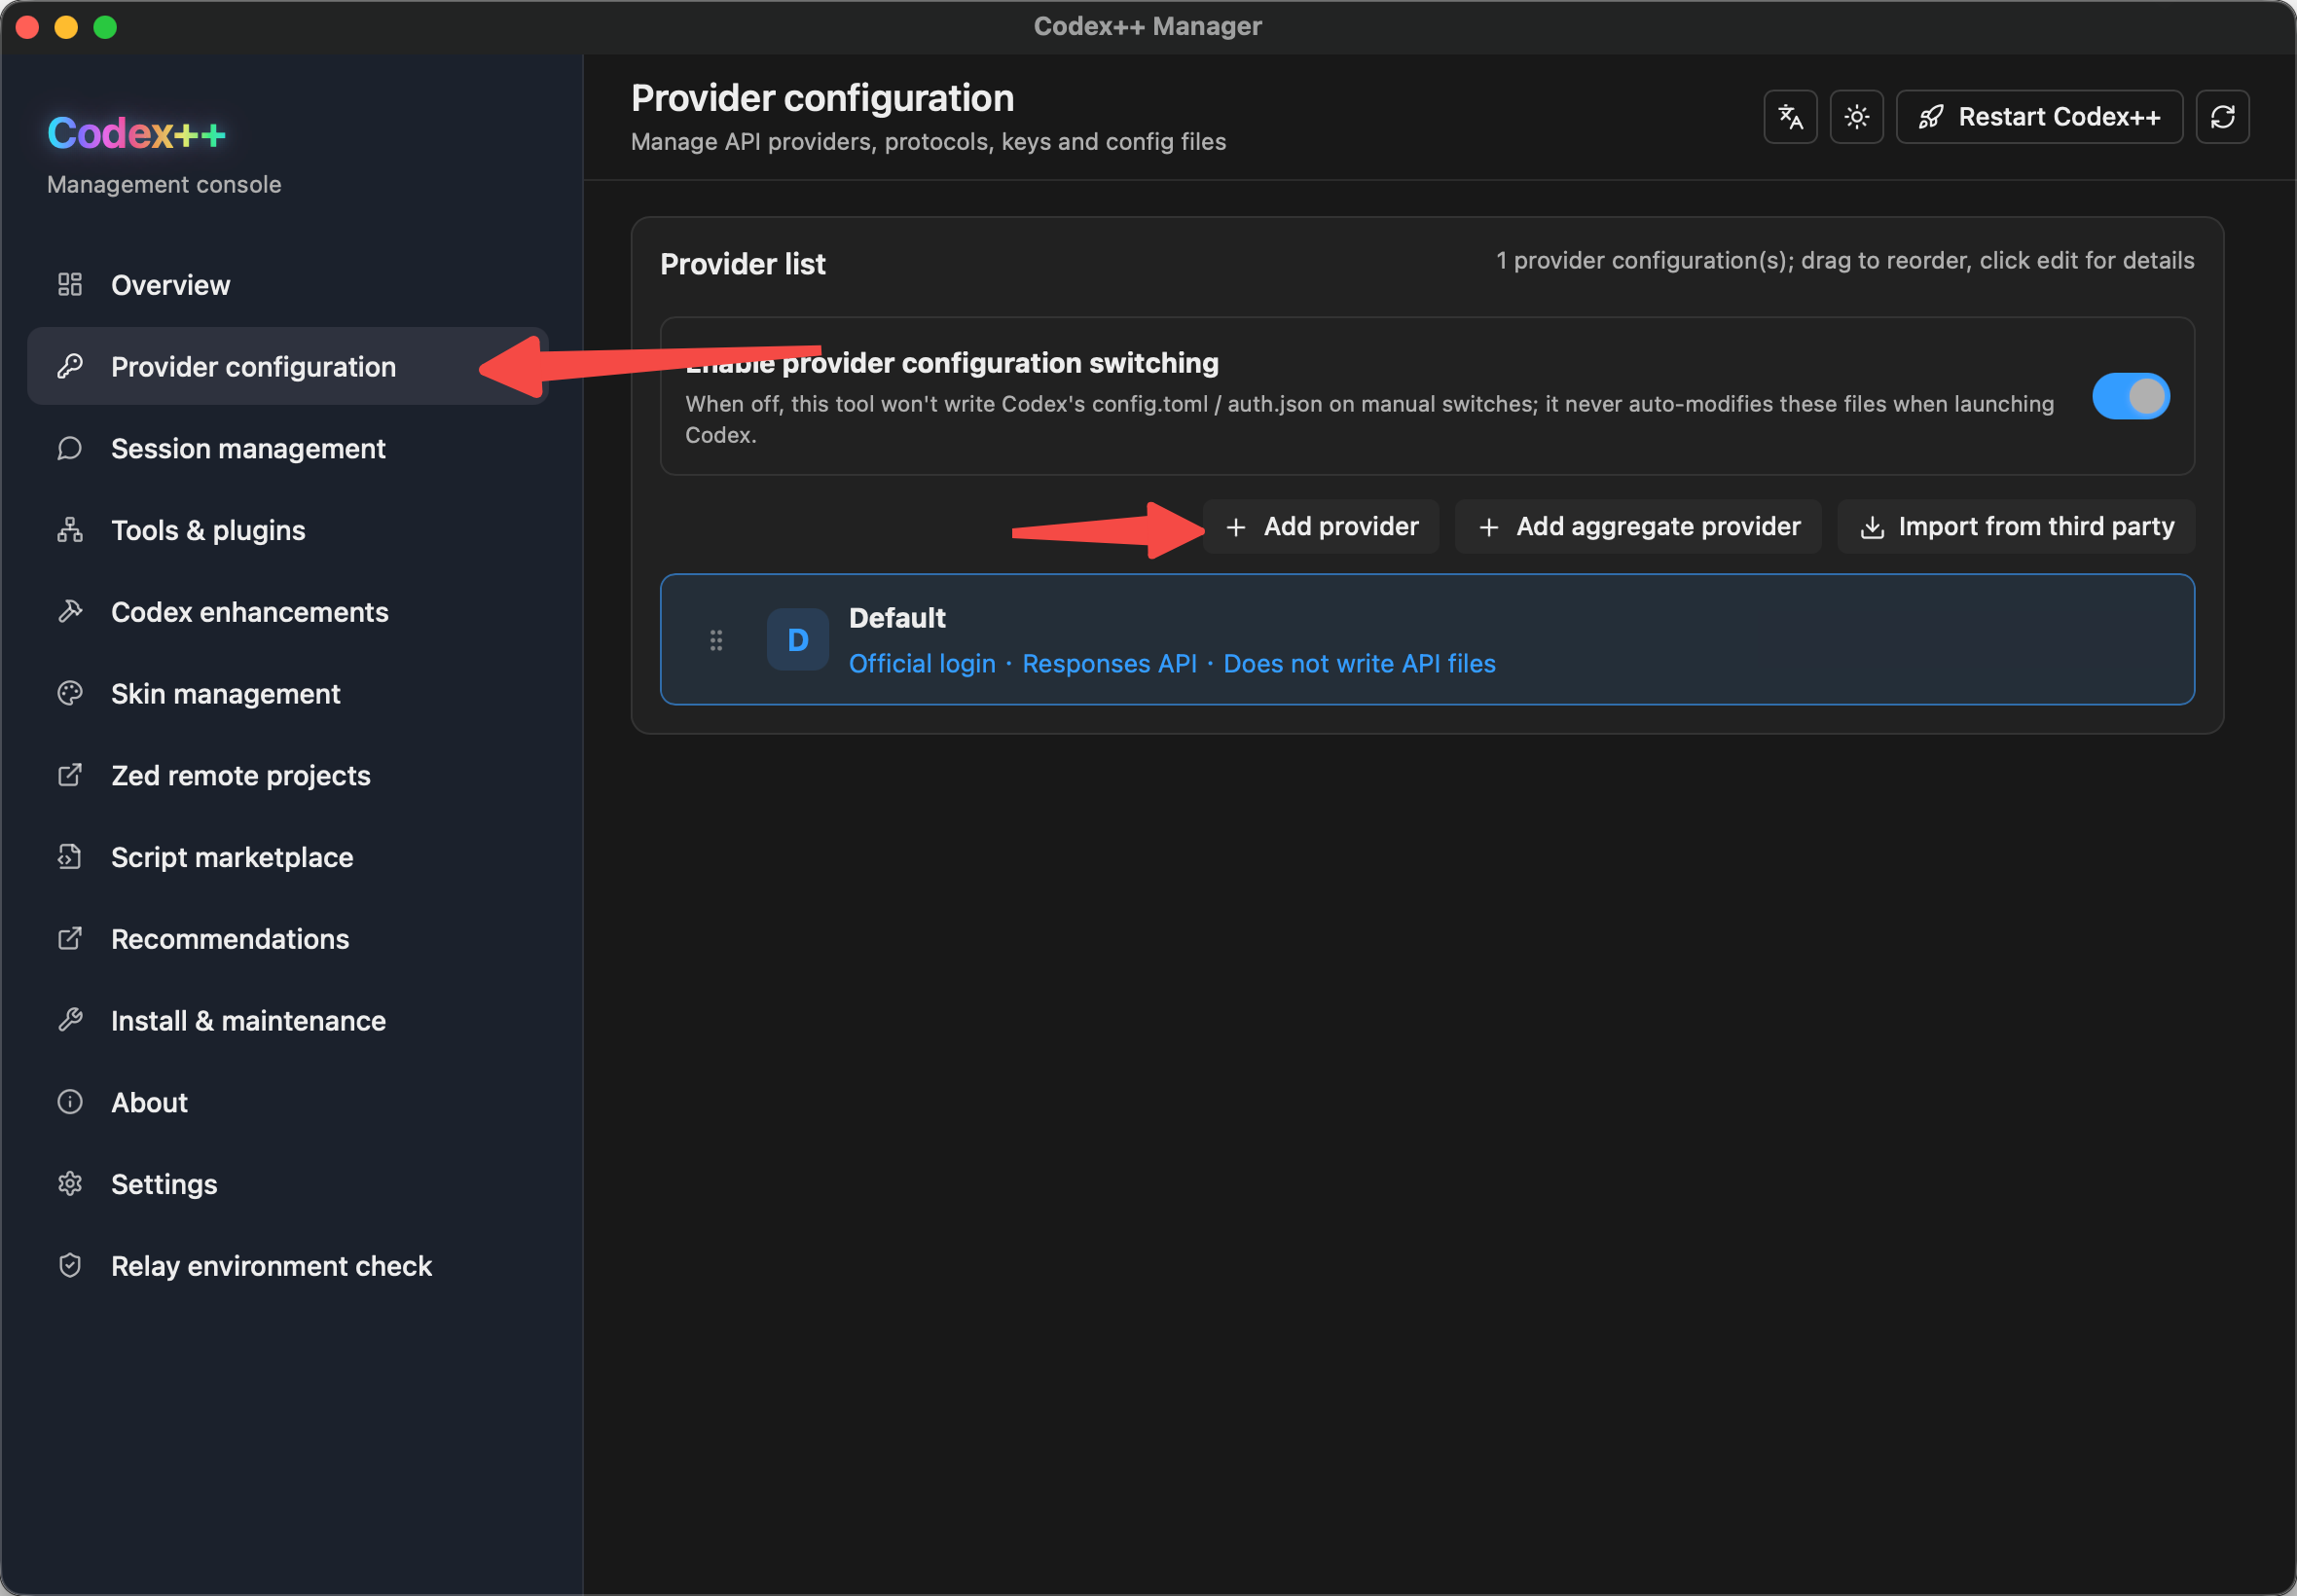
2. Create from a template and fill in the form
Click "Create from preset template" (从预设模板创建), choose the official "OpenAI Official" template, then fill in the form:
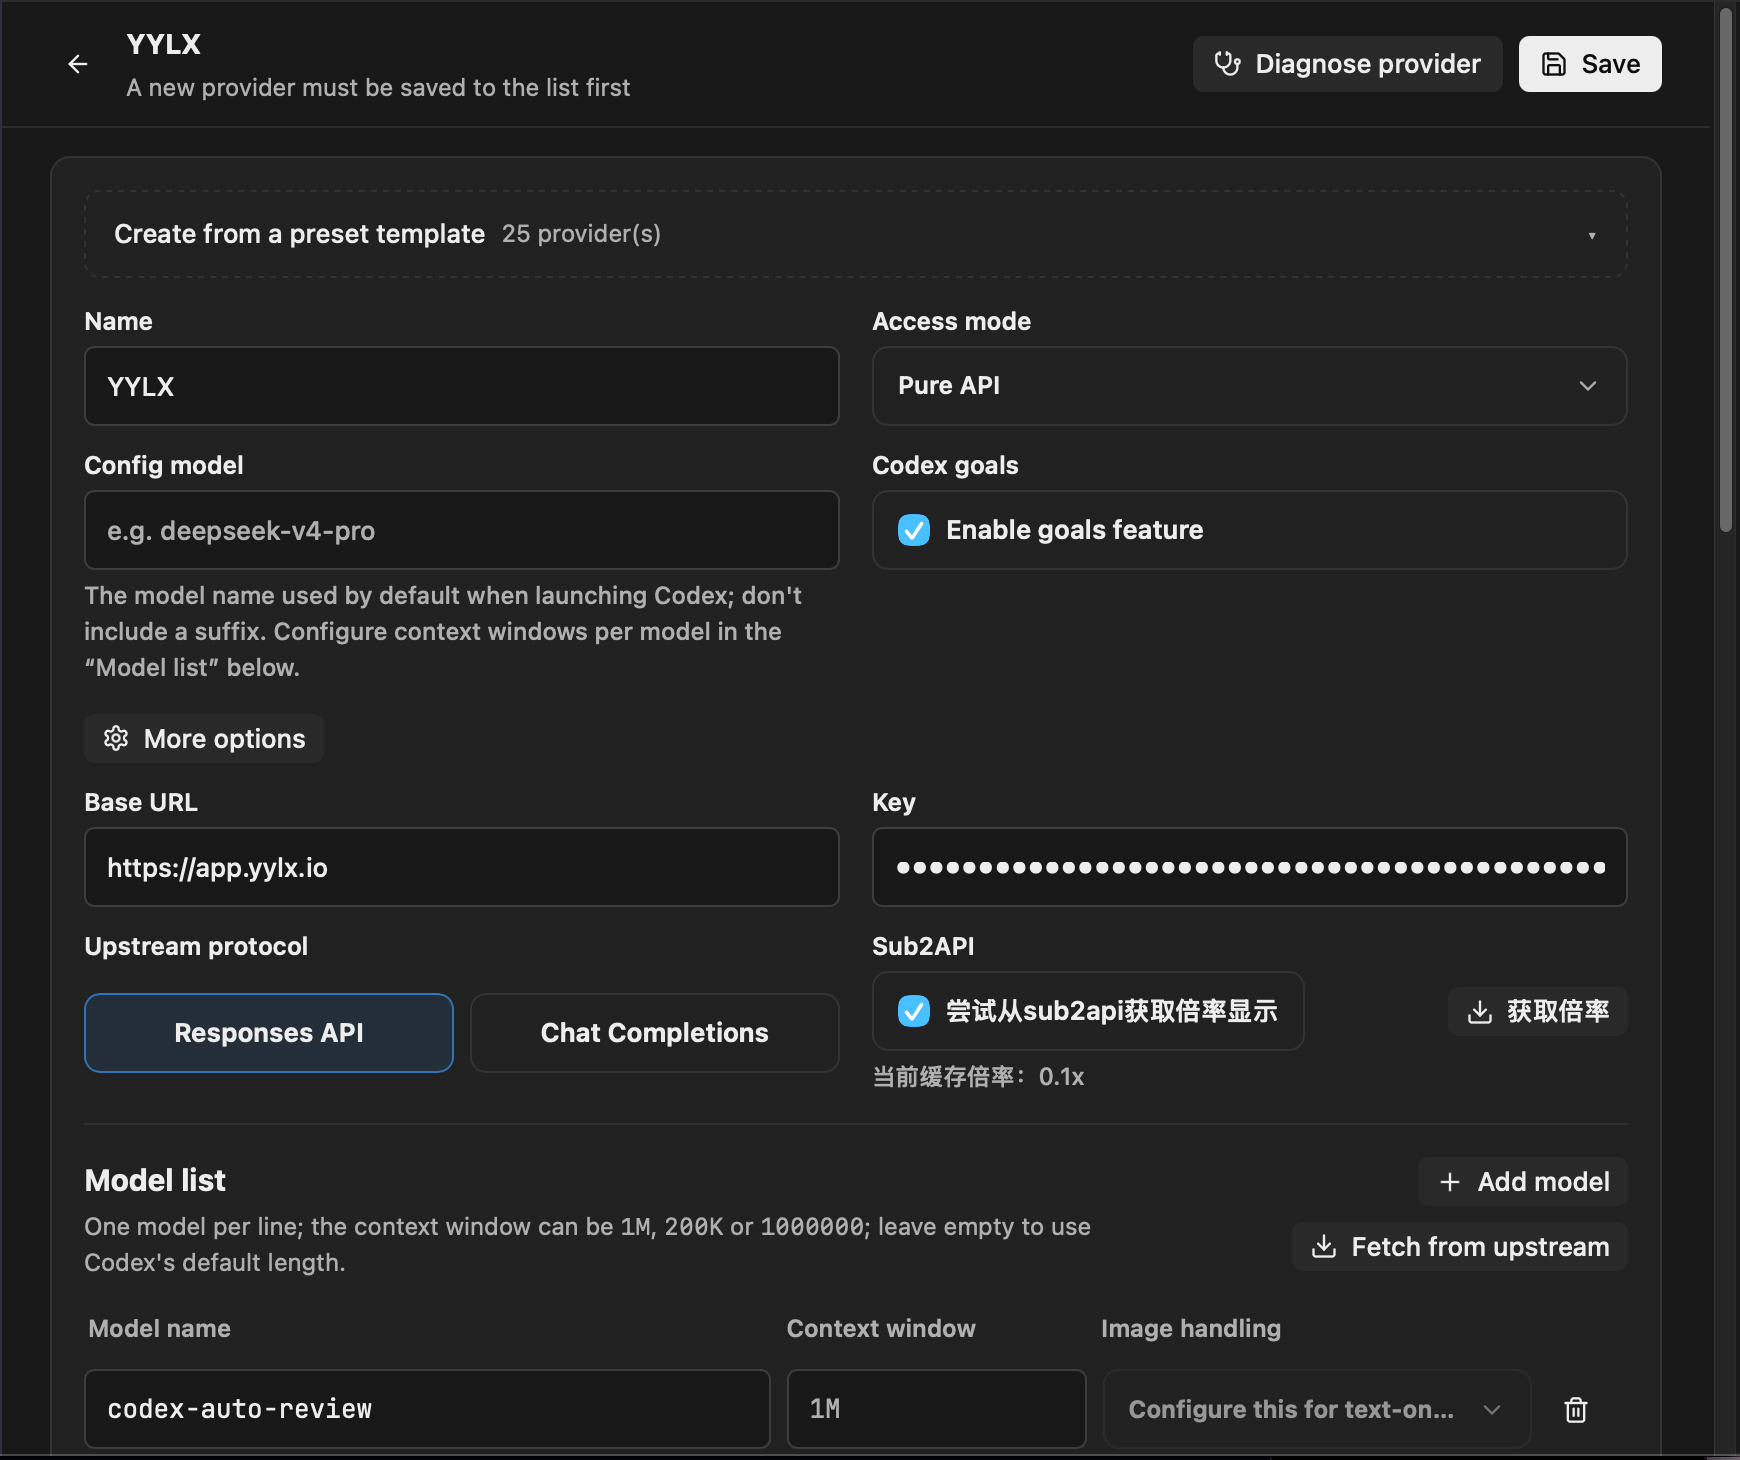
| Field | Value |
|---|---|
| Name | YYLX (this provider's display name, for your own reference) |
| Access mode | Pure API |
| Model | Leave empty |
| Base URL | https://app.yylx.io |
| Key | An API Key created in the yylx.io console |
| Upstream protocol | Responses API |
[!INFO] The "Codex goals / enable goals" switch in the form is Codex's built-in long-term goals mode (
features.goals) — it has nothing to do with connecting to yylx.io. Leave it at the default.
Once the form is filled in, click "Fetch from upstream" (从上游获取) next to the model list to pull the models yylx.io provides, then click "Save" (保存) in the top-left corner.
Test and enable
Back in the provider list, find the
YYLXentry you just added and click its "Test" (测试) button — it sends a hi test. AnHTTP 200in the popup means the configuration works.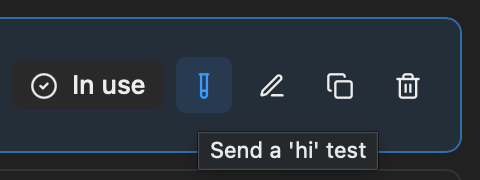
Click the "Use" (使用) button on the left to switch Codex to the
YYLXconfiguration — Codex++ writes it into~/.codex/config.tomlaccordingly.- Launch via
Codex++(not the plain Codex entry). On first use, start with a lightweight request to confirm everything works.
[!INFO] After enabling, Codex++ automatically writes a
model_providerentry into~/.codex/config.toml(managed by Codex++; depending on the version it may becustomor another internal identifier). That name is just an internal identifier in the config file — you don't need to (and shouldn't) rename it toyylx. What routes requests to yylx.io is the Base URL and API Key, not this name, and a manual rename gets overwritten on the next switch. If you want a recognizable name, putYYLXin the "Name" field from the previous step.
Verify requests reach yylx.io
Check both sides:
| Where | What to look for |
|---|---|
| Codex UI | Normal responses; any authentication or unknown-model errors |
| yylx.io usage log | Whether the request you just made appears |
If nothing shows up in the yylx.io usage log, Codex usually isn't switched to the YYLX provider, or you didn't launch via the Codex++ entry.
Troubleshooting
| Problem | Fix |
|---|---|
| The "Use" button is grayed out | Confirm "Enable provider switching" at the top is checked |
| Authentication error | Copy the API Key again from the yylx.io console and check for stray spaces |
| Unknown-model error | Re-run "Fetch from upstream" and confirm the selected model name matches the console |
| Requests don't show up in the usage log | Confirm you launched via the Codex++ entry and the provider currently "in use" is YYLX, not the official sign-in or another configuration |
Related resources
- Use with Codex (official Codex CLI)
- Create an API Key
- CodexPlusPlus project